Materials/Tools:
- EVA foam
- Worbla
- Dowel or acrylic rod
- Craft knife/ X-Acto knife
- Paper
- Pencil
- Scissors
- Ruler/Yard stick
- Square
- Dremel
- Plastidip
- Heat gun
- Soldering iron (optional)
- Spray paint and/or acrylic paint
- Clear coat
- Contact cement
- Brush or sponge for contact cement
- Masking tape
- Mask for dust and fumes
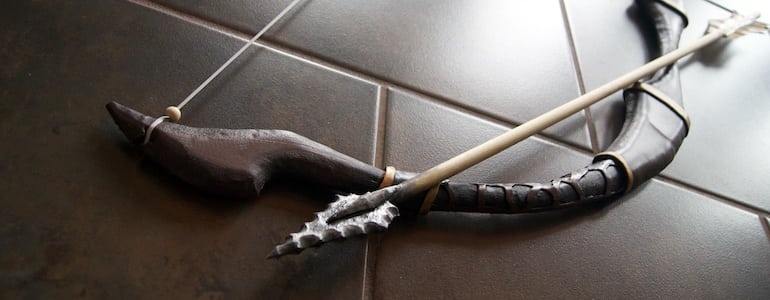
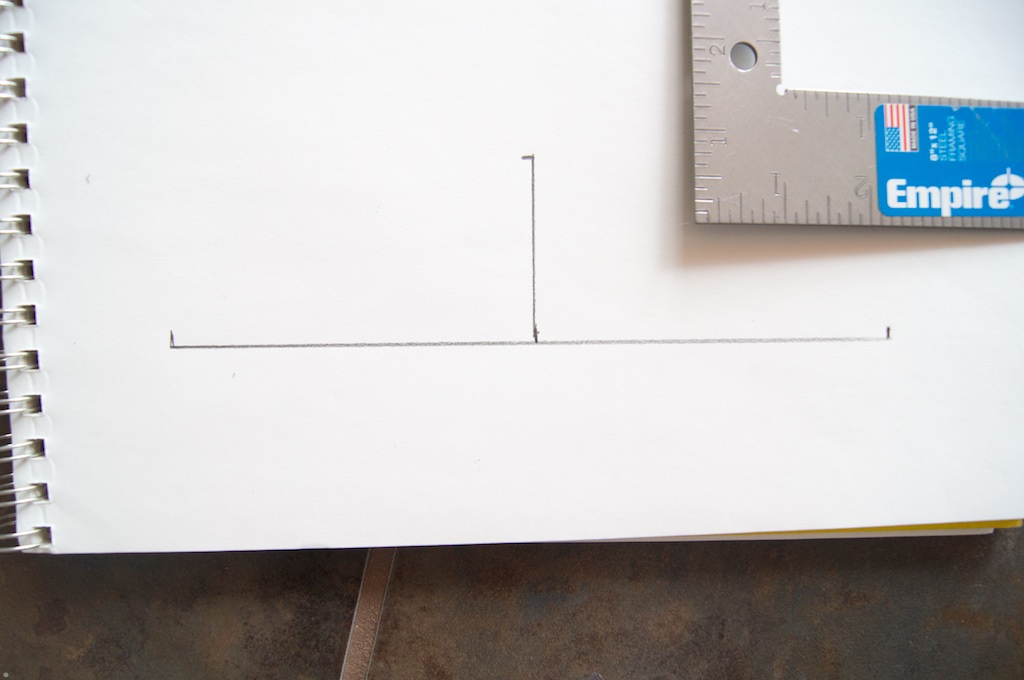
Step 1: Draw out your pattern
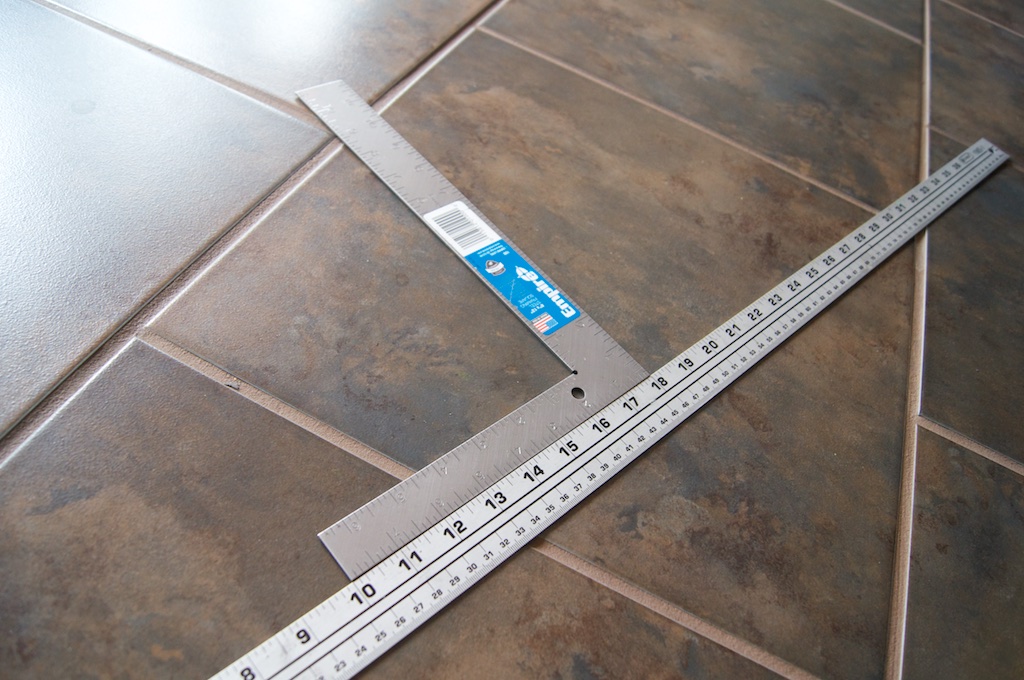
To start, you need a pattern for your bow, so draw one out full size. I start by drawing some lines for the size of the bow, one for the height and a shorter one out from the center for the width. I use the yard stick to draw the height, and the square to help me make the width line at a right angle. These lines make it easy to keep the dimensions of your bow on track. Below is an example of how to draw the pattern with this method.
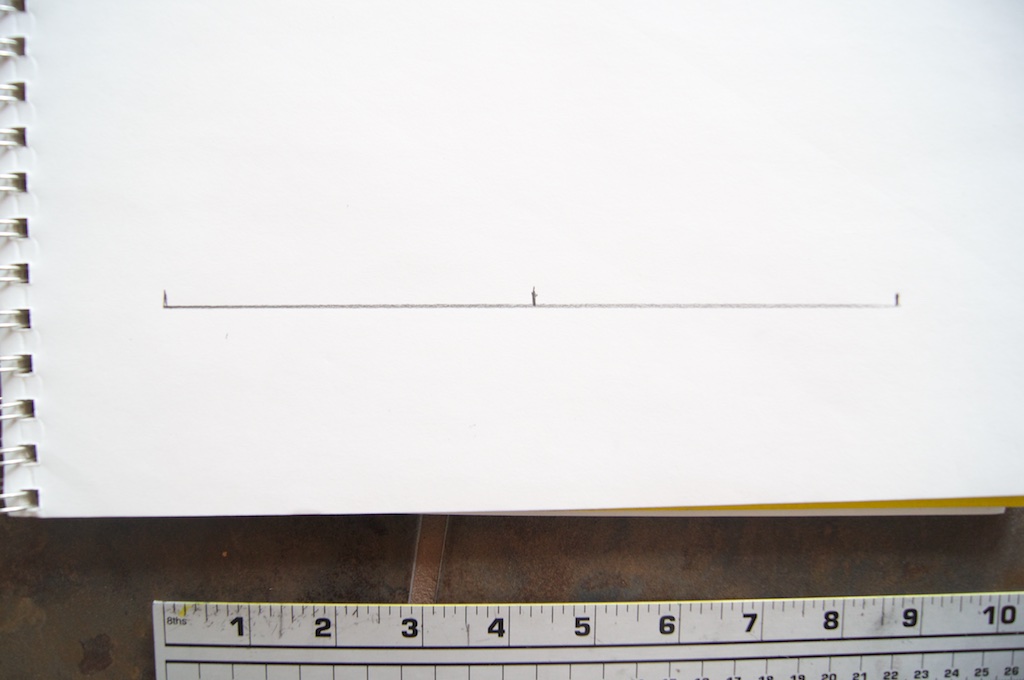
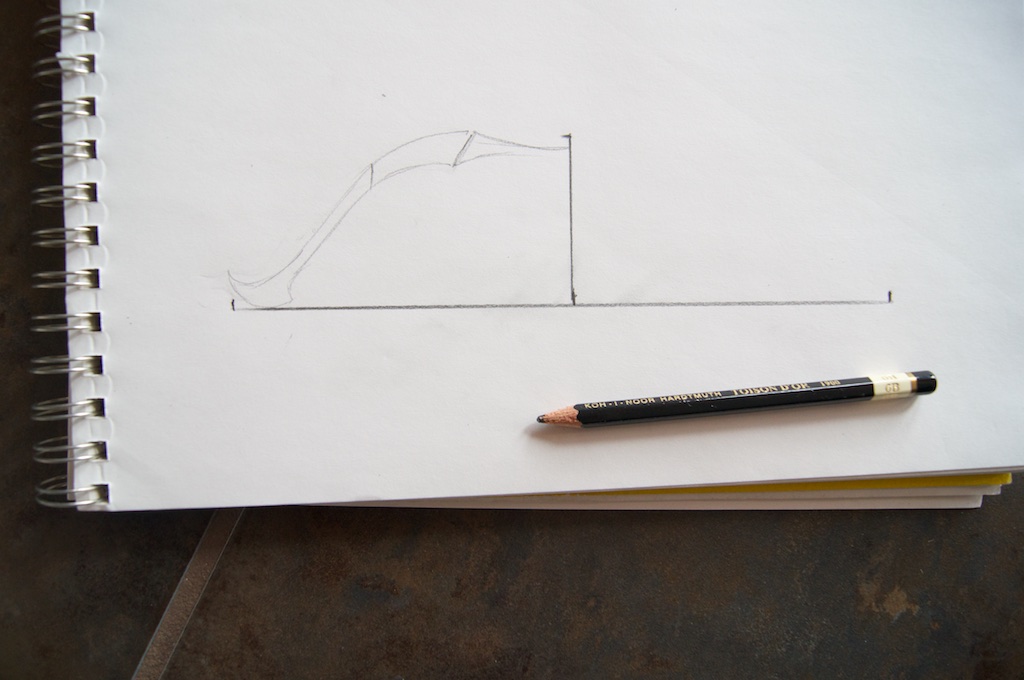
To make the full pattern, just fold your design over along the width line and transfer your lines over to the other side by tracing them. Do this and you’ll have a perfectly symmetrical pattern!
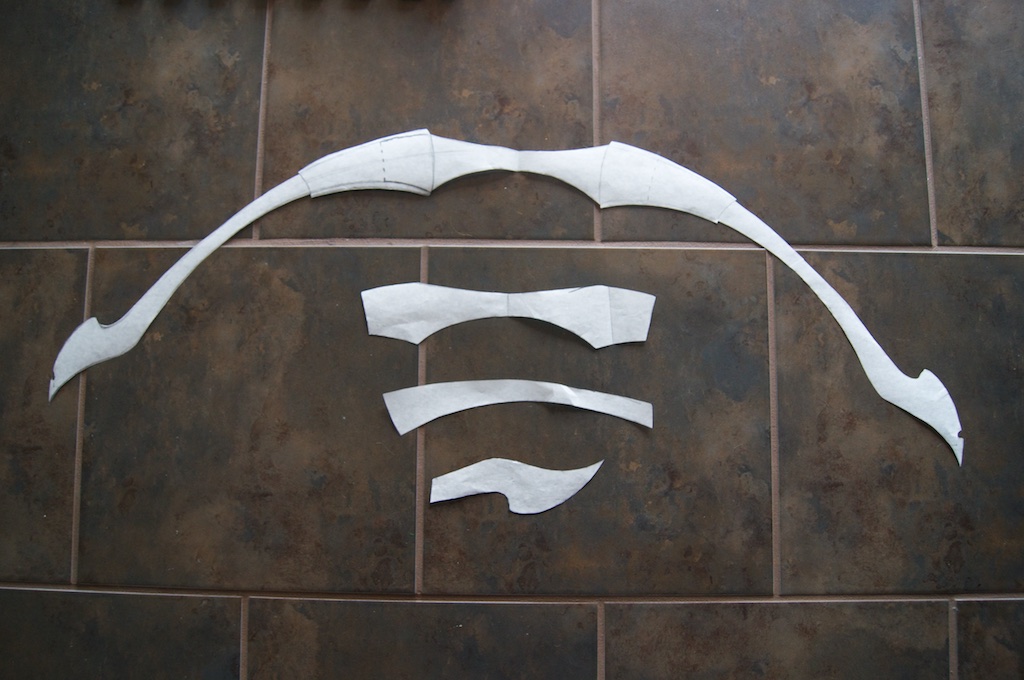
Step 2: Add in seam lines and cut pattern out
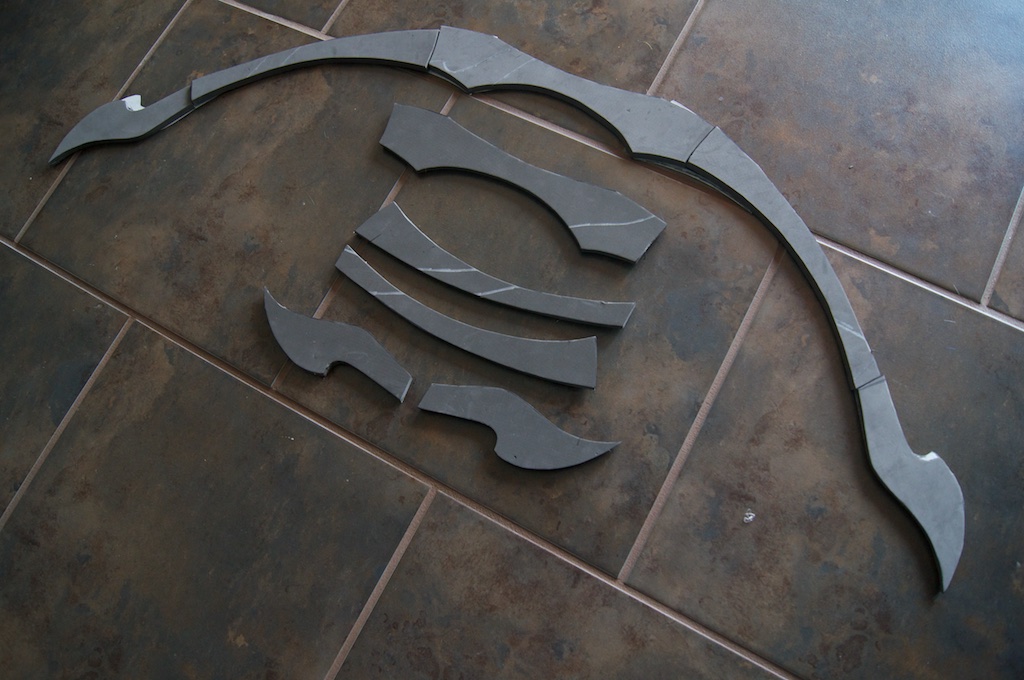
There are still a couple of things you need to do with your pattern before you continue. First off, depending on the size of your bow and the size of foam you have to work with, you may need to plan how you will cut your bow apart and reassemble it. For example, I am using the puzzle piece floor mat EVA foam, so I can’t cut an entire bow out from one piece. I’ll need to cut the pattern apart and cut multiple pieces out to assemble to make my bow. Plan your attack out now so that things will go smoothly later. You can easily hide all the seam lines you’re going to make with added details, so no one will ever be able to see where the seam lines are!

Once you have a plan for details and seam lines, cut the pieces of the pattern out with a pair of scissors.
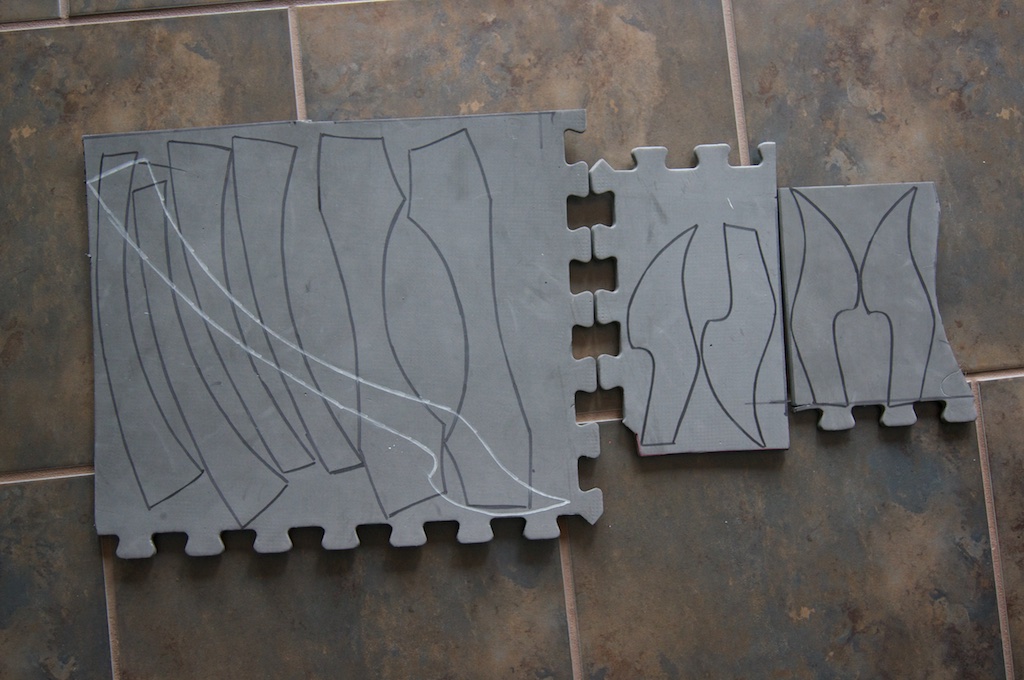
Step 3: Cut out foam pieces
Next it is time to cut your pattern pieces out of EVA foam. If you get the puzzle piece floor mats like I do, you will need to cut out pieces for both the front and the back to hide the texture on the backs of the floor mats. Since the pattern is symmetrical, I needed to cut out four copies of each pattern piece on the arms, plus two copies for the center piece. I use a craft knife or X-Acto knife for this
Step 4: Glue your pieces together
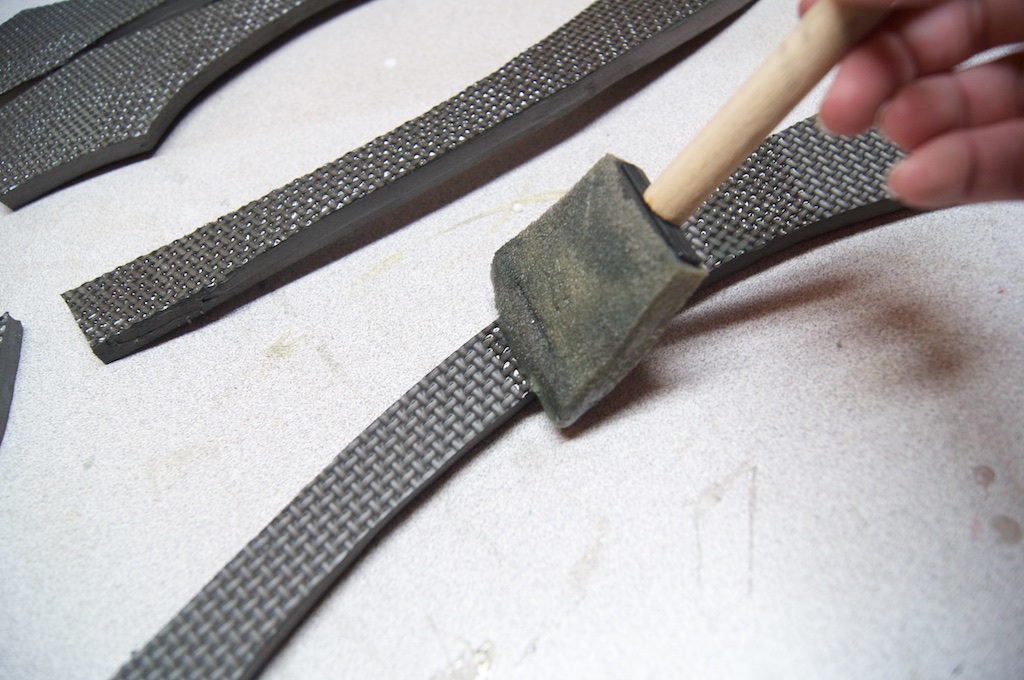
Once you have all your pieces, its time to glue them together. Start by gluing the front and back pieces to each other. Once that is done, glue the sections together to make the bow complete. For this, the best adhesive I have found to use is contact cement.
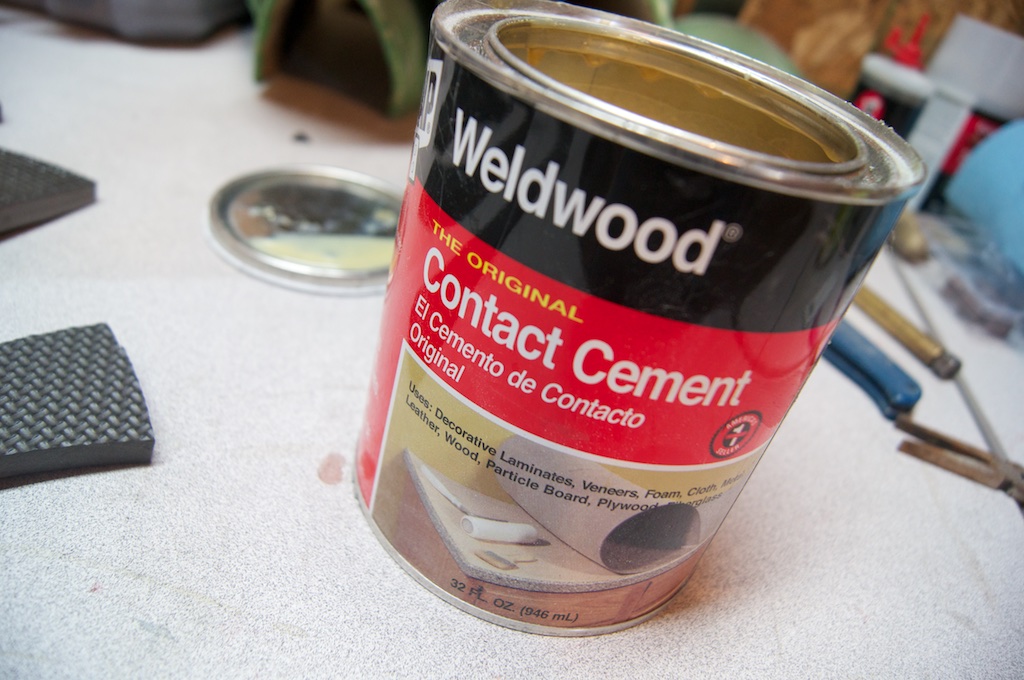
It releases some pretty harsh fumes, so never use it in your house, and always wear a mask so you don’t breath it in. Just take a brush or sponge you don’t care about, dip it in the contact cement, and brush it onto both pieces of foam to stick together. Wait about 5 minutes or until the glue is dry but still tacky, and then stick the pieces together. Repeat the process for all pieces.

The center piece is a bit more tricky than the others. The EVA foam on its own isn’t going to be strong enough to hold its shape on its own with use, so you need to add some kind of support on the inside of the handle. I used an acrylic rod for this, but you can also use a dowel rod. Just carve out a spot for the rod in the center of the handle, and sandwich it in between the two foam pieces as you are gluing them together.
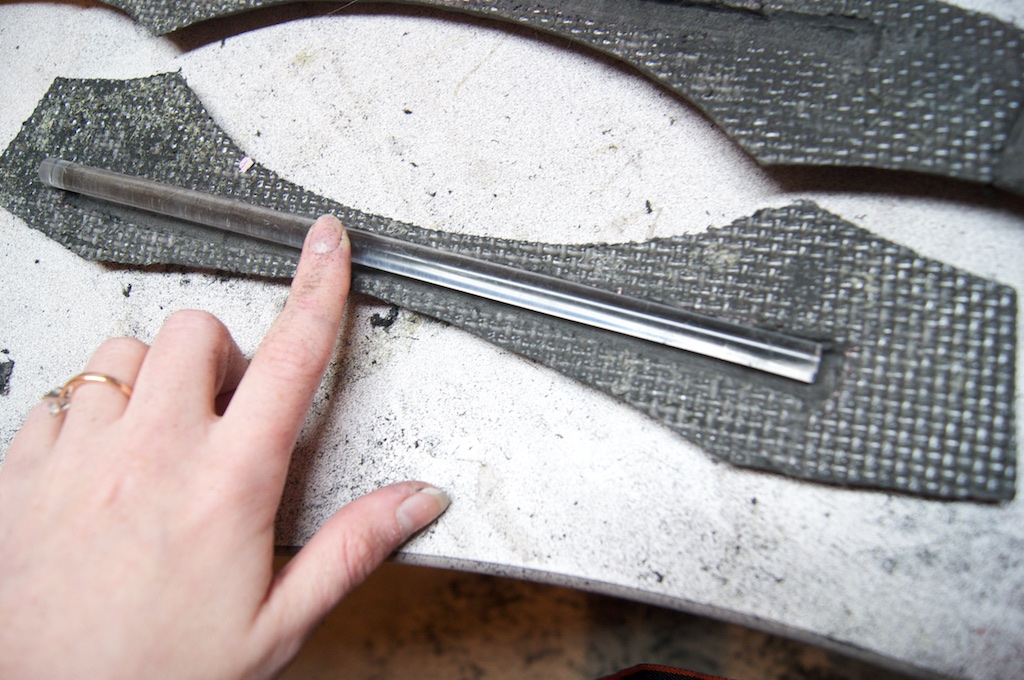
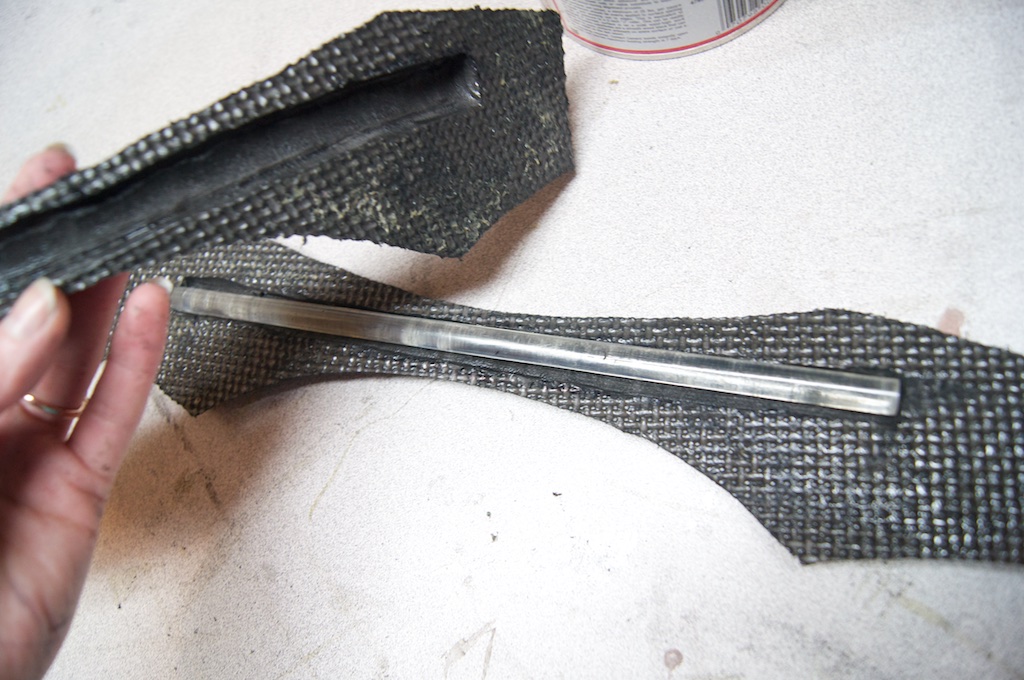
It’s also a good idea to stabilize it further by gluing the rod in place with hot glue before sandwiching. If you want to, you can even get a long acrylic rod to curve and imbed into the entire bow, but just the handle will do the trick here.
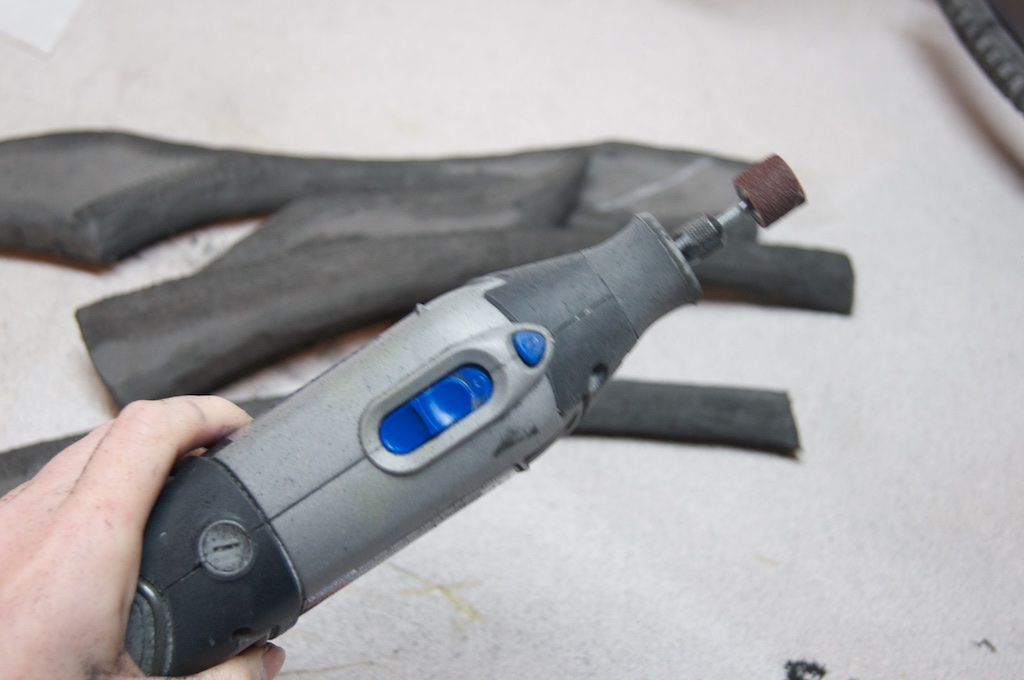
Step 5: Shape your Bow
Now it is time to shape your bow. I always use a Dremel for shaping EVA foam. Your bow probably needs to have a curved surface, so use the Dremel as a sander and just sand the edges into a curve along the edges of each foam piece. Be sure to wear a mask for this part too, so you don’t breath in the EVA foam dust.
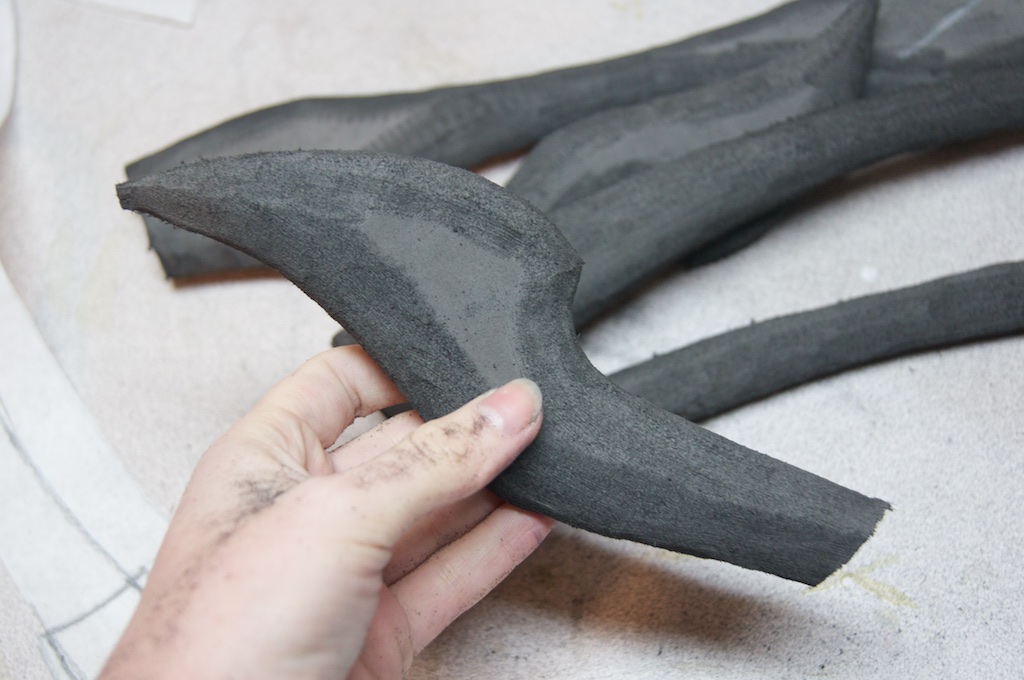
Step 6: Add on the details
Its finally time to hide all those ugly seam lines! I used Black Worbla to make my details, but you can also use more EVA or craft foam to do it. However, if you do decide to make the details with more foam, you will need to have added more support inside the bow like we did with the handle earlier. The Worbla gave more stability to the arms of the bow, so it wasn’t necessary for me to add support to the inside. If you use foam, you’ll need the extra support, so plan ahead if you want to use all foam!
Simply cover the areas that need details with masking tape, and draw the design over the tape to make the pattern. Carefully pull the tape off without damaging your newly made pattern, and cut it out. Transfer the new pattern to a piece of Worbla (I used a double-thick layer) and cut the Worbla piece out. Then use your heat gun to soften the Worbla and apply it to your bow. Add any and all details you want this way!
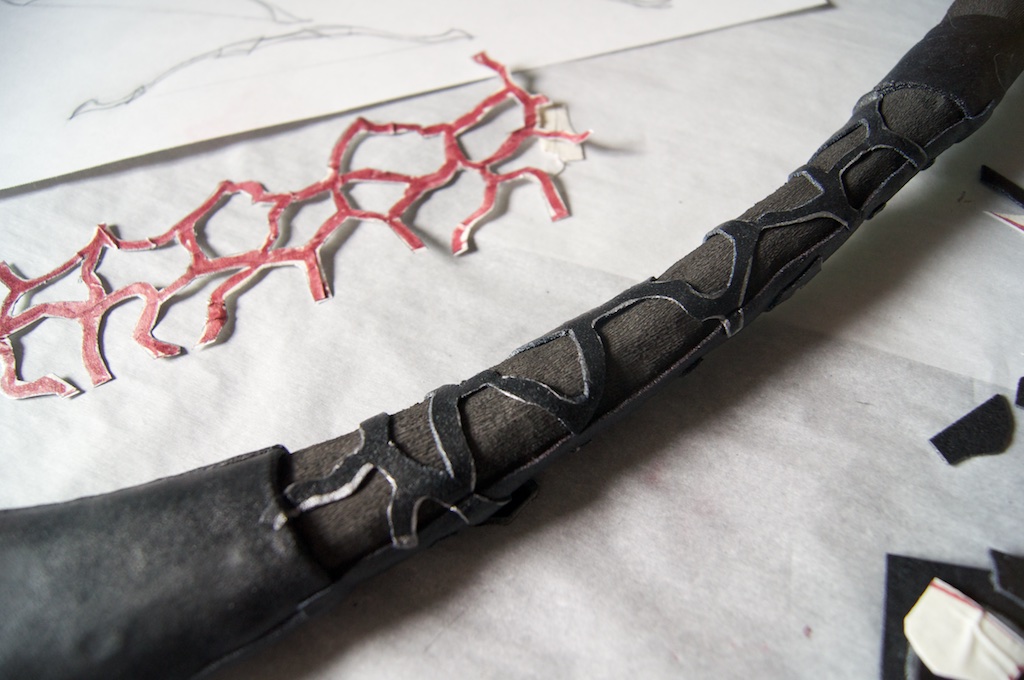
To get rid of the seam lines in the Worbla, I used a soldering iron to flatten them out first, and then used my Dremel to clean them up, but you could also just use the Dremel if you don’t want to deal with the soldering iron.


Tip: If you are using a soldering iron, make sure you have a sponge soaked in water nearby to clean the tip of the iron off. If you don’t clean the tip of the iron off every once in a while, the iron will eventually start to smoke and give off fumes because of the burning plastic stuck to the tip.
If you haven’t yet, take the time to cut some notches into the ends of the bow where the string will attach. You can do this by simply using a craft knife or X-Acto knife.

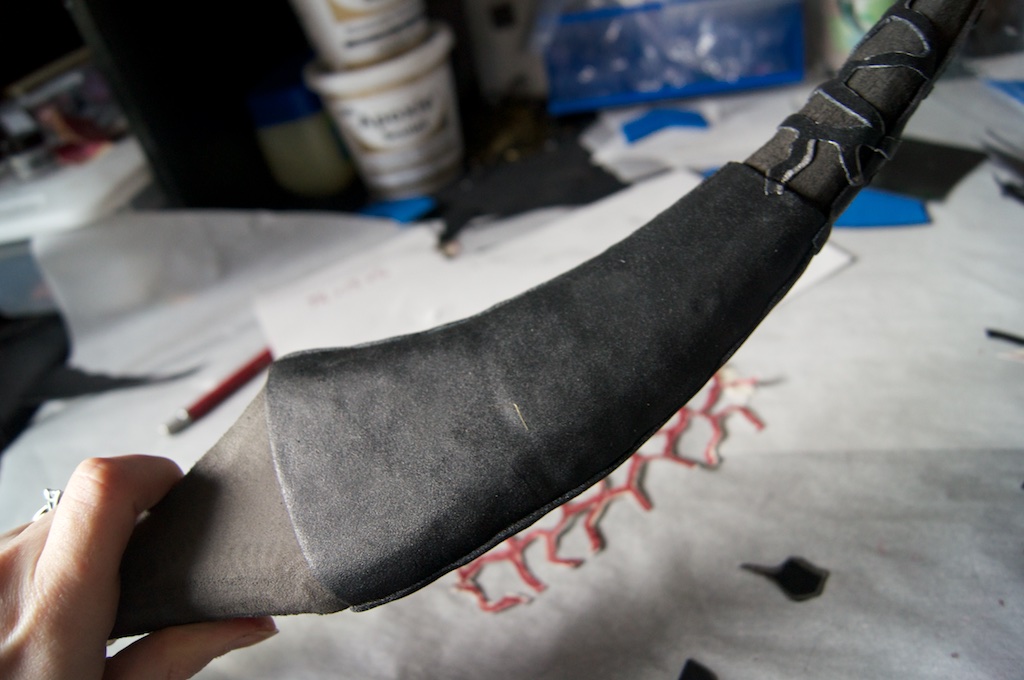
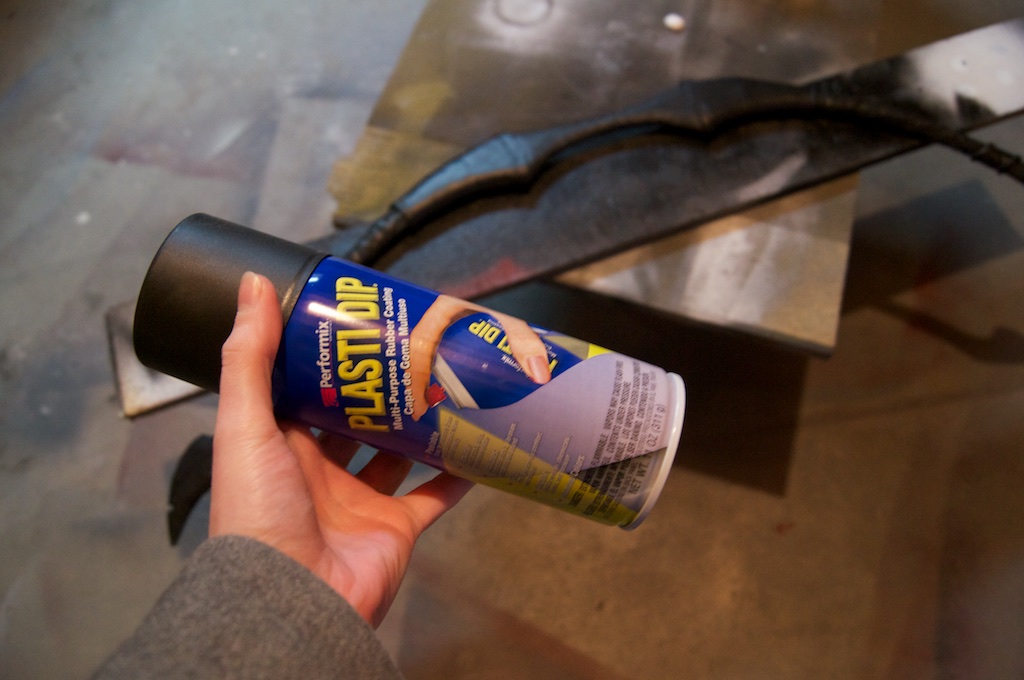
Step 7: Plastidip
Now you are going to cover your entire bow with Plastidip. It might seem a bit odd to cover Worbla with Plastidip, but it works very nicely in this situation. The foam needs to be sealed with something, and it also needs to remain flexible since the bow will flex with use. Using something like wood glue, gesso, or another kind of filler would not work here because those products will crack under pressure. Plastidip, however, remains very flexible. It’s perfect for this job. The reason we also cover the Worbla with Plastidip here is because it just simply wouldn’t make sense to try and tape the Worbla off and prime it with something else. Its ok to coat it with Plastidip, so just don’t try to fight it! Plus, the Plastidip will actually help smooth the Worbla out quite a bit, so there’s no losing! I only used one layer on my bow, but you can use as many as you want!
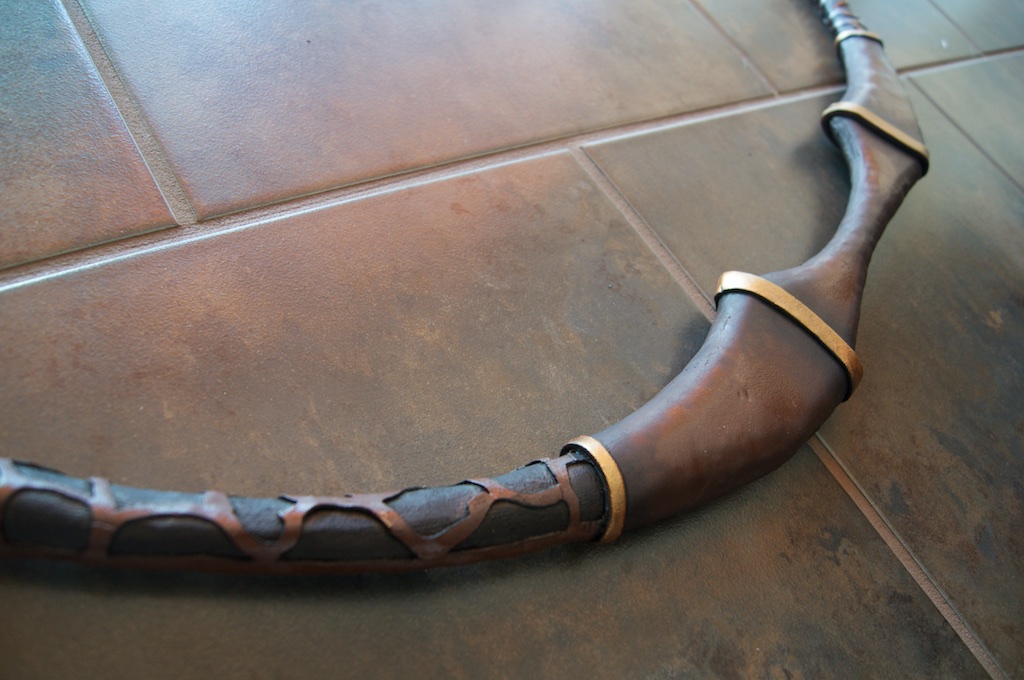
Step 8: Paint and seal
You can paint your bow in a number of different ways. For this particular project, I gave it a base coat with brown spray paint and added weathering and gold edges with acrylic paints. If you’d like to learn more about painting props, you can check out this painting tutorial. I also sealed the paint with a matte finishing clear coat spray, but you can use any type of finishing spray you like.
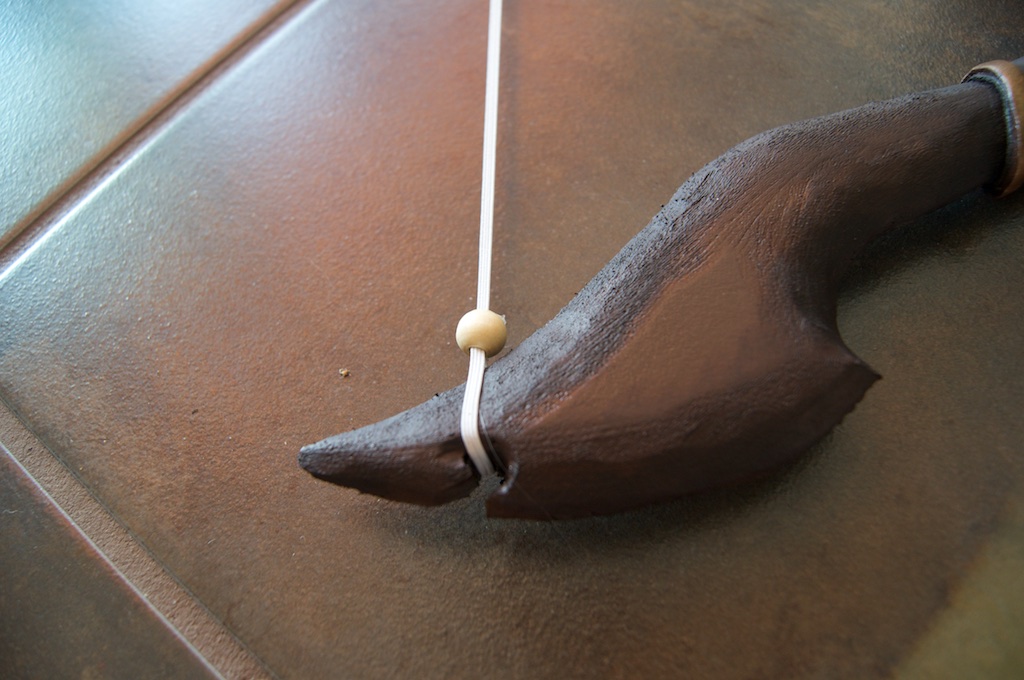
Step 9: Add the string
The very last step is to add your string. I used a thin elastic cord for mine. The bow will flex when you pull the string back, but if the string itself is also flexible, it helps to not put so much pressure on the bow. The slight flex in the bow also makes for a very pretty effect when you pose with it! To add the string, I simply tied loops on each end, added some beads over the knot to hide the end of the string, and looped the ends of the string over the notches on the ends of the bow.
Now all you need to do is make some arrows and you’re done!